Hippo developer training
Hippo let me follow the three day developer training for CMS 7 and Hippo Site Toolkit 2 (HST2) by Jeroen Reijn. I don’t live inside a cocoon so I knew already which new products had been developed. Until now I hadn’t done any implementation yet with Hippo CMS 7 and the HST2 because I was too occupied with Hippo CMS 6 projects. Since I’m also a Hippo trainer it was a good chance to get to know our new training programmes.
Day 1: introduction
After we received the handouts of the training we introduced ourselves. It was a pretty mixed group with developers from partner implementation companies, an independent consultant, developers from a customer and me. Jeroen explained the Hippo architecture which is basically still the same as with version 6 but based on different technologies. The WebDAV repository has been replaced with our JCR Repository (based on Apache Jackrabbit) which also uses Apache Lucene for fast indexing & searching. Hippo CMS 7 is still an application that runs separated from the repository and has been written in Apache Wicket. For front end applications you’re free to choose a technology but Java is recommended because of the J in JCR 😉
Jeroen showed us the CMS and the Console to show what’s happening inside the repository. The trainees all got a laptop from Hippo with a VirtualBox image for the training to "play" with the CMS and the console. No need to bring your own laptop for the first two days!
Day 2: changing templates and HST2 introduction
After some explanation we started to create our own document type. We used version 2.03.00 (later versions have some issues with the graphical template editor which are being solved soon). With just a few mouse clicks I had a “blogpost” template with a date, title, WYSIWYG field and a checkbox for “allowing” comments. Because this template isn’t very difficult, it’s nice to create it by the GUI editor instead of creating XML configuration by hand (which is still possible if you like to).
After lunch Jeroen started explaining the Hippo Site Toolkit version 2.03.02. The HST is not a framework but a toolkit to create your own website using Hippo CMS and Hippo Repository. At this moment there’s an HST for JSP sites but other (Java) technologies may follow in the coming years. On the VirtualBox image there is a sample site with a navigation structure, a news listing and a view for detail pages. All configuration for the menu structure, sitemap (mapping between URLs and repository paths), pages and templates is done in the repository. Now you have to do it by hand but in the near future there will be a configuration editor in the CMS. That would make it easy for the webmaster to change the URL structure or the way pages look.
The URL mapping is easy to understand if you know how matching works in Apache Cocoon. _default_ is the equivalent of * in a Cocoon sitemap and _any_ is equal to ** in the WildCardMatcher. The following navigation structure would match a URL like /News/2009/04/My_blogpost.html:
News |- default |- default |- any.html
The "wildcards" _default_ and _any_ can be added as parameters to the rendering class that can pass it to the JSP so you can display "April 2009" in the title of your news overview if a visitor goes to /News/2009/04. As last exercise we added a new document type for events in the CMS, created some events and added a new event listing to the existing example site.
Day 3: create your own site from the Maven archetype
For this day we were asked to bring our own laptop so we could leave with a functional website at the end of the day and have all the necessary software installed to create another. Jeroen explained about Apache Maven en let us create a project using the Maven archetype:
mvn archetype:generate \
-DarchetypeRepository=http://repository.onehippo.org/maven2 \
-DarchetypeGroupId=org.onehippo.ecm.hst \
-DarchetypeArtifactId=hst-archetype \
-DarchetypeVersion=2.03.02 \
-Dversion=1.01.00 \
-DgroupId=org.example \
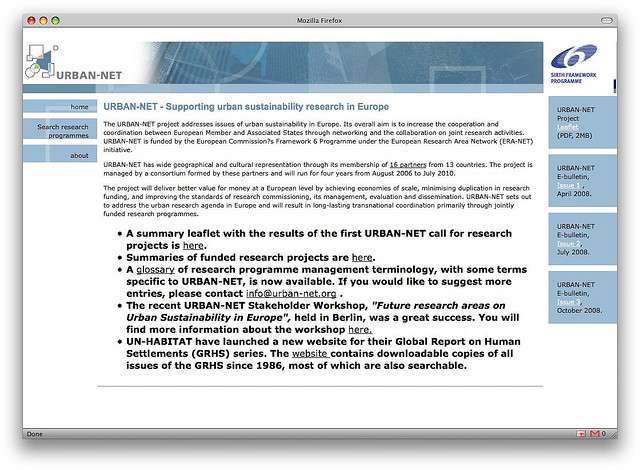
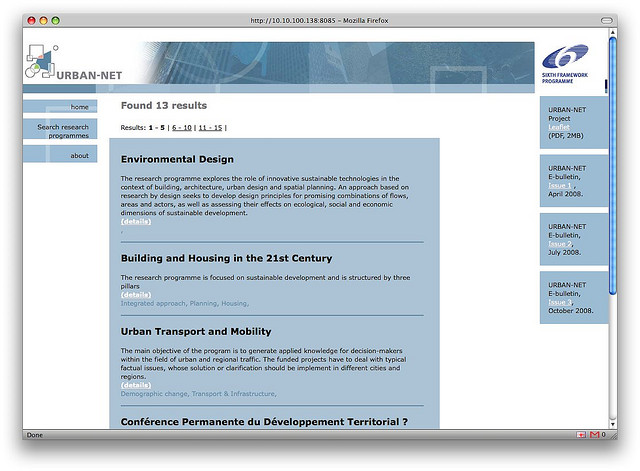
-DartifactId=myprojectIt creates a project on the file system in three parts: the content, CMS and the site. After lunch we started to build our own website. I took the Urban-net website as example because it has an easy layout (1 header and 3 columns: left hand navigation, dynamic content in the centre and some downloads on the right hand site).
First I created two document types, one for normal text and one for “research programmes” (leaving away some fields compared to the original site). Then there was the time consuming part: copy-pasting enough content for a decent paging in the site. For real projects there are migration tools available to convert the XML content from the WebDAV repository to JCR nodes and properties.
For the themes I used an ordinary repeating text field but the Hippo ECM Tagging add-on would be more user friendly in a real life implementation.
After defining the several sitemenu parts, components, pages and templates it was time to add the design and copy-paste the HTML into the JSP files. I could not implement everything I wanted (helped others as well and the time was limited). However in just a few hours I managed to implement a subset of the normal site. It does not contain search, no faceted navigation, the links on the right hand site are fake but it does show the basics.
After the training it was time to enjoy the beautiful weather on our balcony with some drinks and crisps.